D Using your site for e-Commerce
Download PDF Version

1. Introduction
Our system allows you to set up an online shop so that your users can buy products directly from your website. They can pay online via your PayPal account (see appendix below if you're unfamiliar with PayPal) or offline if you prefer, or a combination of both. IMPORTANT. It is vital that you have validated your registered email address with us before using our ecommerce facility!
2. Adding a shop

2.1 Select a template with a shop
The easiest way of creating a shop is to select a template that already has one. You can do this by clicking on Styling Site styles. To see the ecommerce templates, left click next to By features and select Ecommerce. Left click on the first one to view and then scroll your way through. Click on the USE TEMPLATE icon when ready.
IMPORTANT When you upload a new template you will lose any content you may have uploaded. If you have already built your site - or have uploaded a lot of content already which you don't want to lose - you can still add a shop section as in 2.2.
2.2 Or add a shop section
If your template does not have ecommerce you can still add a shop section by going to Content Sections Click on Add new section Select Type Online shop Under the field Display mode select either Product grid, which means the system will show your products in a grid format. Or select Products list, in which case they will be listed one on top of the other SAVE. If you Preview you will see the system has added a Shop section and a Shopping cart section.
3. Setting up your site for ecommerce
3.1 Set up/edit your PayPal account
Set up a PayPal account. If you wish to take online payments you can do so via a PayPal Business or Premier Account account (PayPal personal accounts will not work):
*Go to www.paypal.co.uk or www.paypal.com. Opt for either Business Account or Premier Account. Take a note of your PayPal email address, as you will need this when you go back into the Admin system.
Activate 'Auto return. We also advise you to set up Auto return in your PayPal settings, so that your customers will automatically return to your website once they have finished their payment in PayPal. Log onto PayPal Under the My Account tab select Profile Select My selling preferences Under Website preferences (nearly half way down), click on Update Tick On for Auto return Under Return URL, enter your domain, eg http://www.joebloggs.com or http://www.clikcraft.com/joebloggs Scroll down to the bottom and Save.
3.2 Your ecommerce settings
Click on Ecommerce Payment integration in the admin system Complete as follows.
i. Payment options
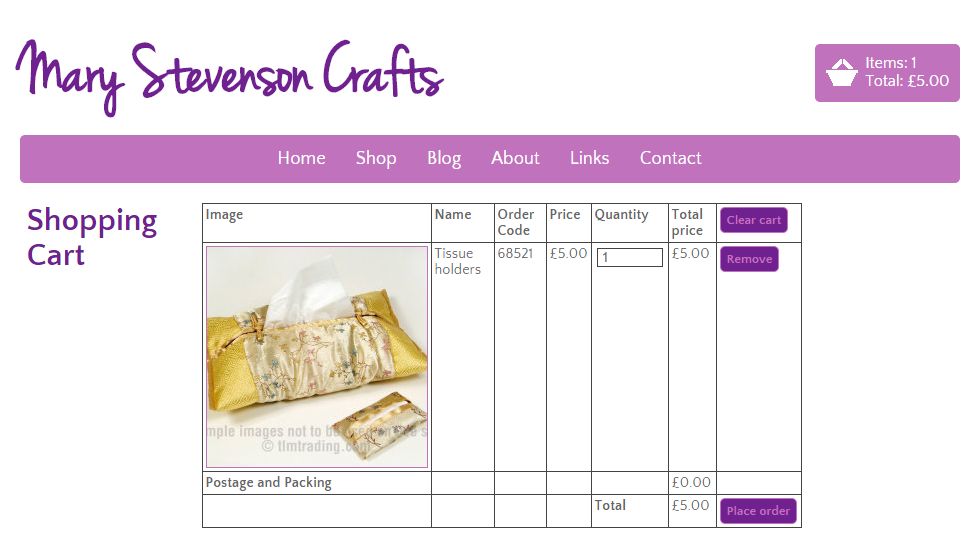
Use shopping cart. This is usually ticked, so that your visitors can add items to the cart and proceed to a checkout, rather than a separate order for each item. When you tick this option, a new section is automatically added to your site, which you can edit in Sections.
Show product image in cart. If ticked, an image of the product appears in the user's cart (basket).
Currency. Select your currency, which your prices will be quoted in. If you are using PayPal, this currency must be available from them.
ii. Shipping options
Shipping charge type. If you would like the system to add a shipping cost, choose whether you want to apply a flat rate per order, or a staggered one depending on the total order value. If you select Staggered then the system will prompt you to enter the staggered fields you would like further below.
Shipping flat rate charge. If you have selected a flat charge, enter it here. Remember, do not enter a currency sign.
iii. Payment methods
Accept offline payments. Tick this box if you want to accept offline payments, eg payment by invoice, cheques, etc (handy for business to business users where invoicing is usually done separately). You can choose to accept both offline and online payments, so your customers can choose which is more suitable for them. See 4.3.2 below for details.
Accept PayPal payments. Tick if you are using PayPal.
Merchant key. If so, enter your primary PayPal e-mail address.
Use PayPal Auto return. Tick if you have set up Auto Return in PayPal (recommended, see 4.2.3 above).
Click on UPDATE. You are now integrated with your payment provider! The next step is to set up your product categories and then start uploading your product data.
3.3 Selling without PayPal (or as well as)
Some users prefer visitors to contact them directly if they are interested in placing an order, and will typically accept payment by bacs or cheque. You can still use the integrated shopping cart to do this. You can even combine online payments with offline, in which case your customer will be offered a choice when buying. Instead of making a payment at the end of their order, your customers will be taken to the checkout page where they can enter their details and the order will be saved for you to view in your admin system (see 5. below for details). You then process the order and arrange payment yourself.
For this to work, all you have to do is go to Ecommerce Payment integration Tick Accept offline payments UPDATE. If you are using both offline and online, you will also need to follow the procedures in 3. above.

4. Setting up product categories and uploading product information
4.1 Adding product categories and deleting the default ones
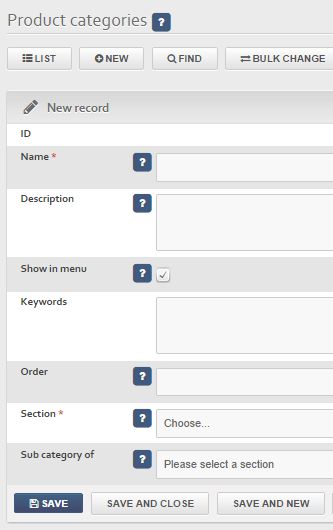
Our system allows you to group your products into product categories, eg Paper crafts, Wooden crafts, etc. If you do not need these skip to the next section. Otherwise, go to Ecommerce Product categories Click on NEW at the top or edit one of the default ones by clicking on the pencil icon to the right.
You are only likely to need to enter data in the Product category field and Order (don't forget to use a high integer such as 10, 20, etc). Create as many Product categories as you like.
If you do not want any categories, eg all of your products fit into the same category, then delete them all except any Best seller ones (or similar wording). Incidentally our Simple shop templates do not have any product categories by default other than the Best seller one.
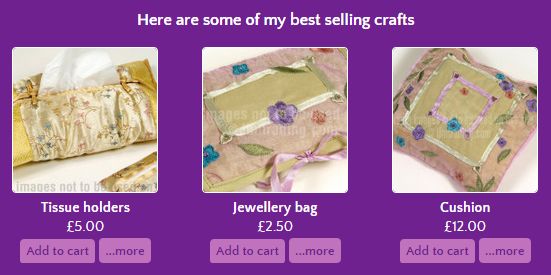
WARNING DO NOT DELETE THE 'BEST SELLER' CATEGORIES! These are used to assign whichever products to the Best seller panels, typically on your home page.
4.2 Adding products
Now you can start adding your products at Ecommerce Products Click on NEW at the top. The fields are self-explanatory but it's worth pointing out the following:
qProduct name. Try to keep this short and to the point.
wProduct categories. If you have set up product categories, left click here and select the category/ies you would like the product to appear under. IMPORTANT If your template has a best seller panel, typically on the home page, select Best seller panel (or similar wording depending on your template) and the product will appear on it.
eOrder code. You must have a unique reference code for each product. Just make one up if you don't already have one.
rPrice. Do NOT enter a currency! Just the value in numbers, eg 12.50.
tReduced price. This is a good feature as the system will show both the original and reduced price.
yShort and long descriptions u . These are optional although we would recommend including at least the Short one. Keep your text short and to the point and don't forget to include product dimensions if it is unclear by the image.
iMain image. Click on UPLOAD NEW IMAGE and browse your computer to upload.
oSort order. The order the products appear within their category.
aRelated products. This is a really handy feature as it will list any related products when the user clicks on your product.
{$}Repeat the process for each of your products.
{$clear}
4.3 Selling mp3 files and videos
{$}If you would like to sell mp3 files or videos, eg if you are a musician or a performer, the best thing to do is create a product in the usual way for each file/video. Upload a demo Soundcloud file or demo You Tube video within the Product description field. See Cliktips Guide A8 How to add videos and Soundcloud files. On receipt of order, email your customer a copy of the mp3 file or video.
{$}TIP: Make it clear in your text that you will email the file/video to the customer, ie it can't be downloaded via your site, eg "We will email you the complete mp3 file within a maximum of 2-3 days of receiving payment for your order."
4.4 Deleting the default products
{$}If your template has any defaut products in it, go to Ecommerce Products Tick the products to delete Scroll down and click on DELETE MARKED. Altenatively just click on the bin icon to the right of each record.

4.5 The Best seller panel (usually on homepage)
{$}Don't forget, for products to appear on one of these panels you will need to go to the product record and select the best seller Product category. To edit the text at the top go into Preview edit, ie preview and then click on the Edit button in the top left and then click on the panel itself. Click Edit against the Title field.
4.6 The Shopping cart (basket) and checkout form
{$}Once you have entered some products preview your site and try shopping yourself. You will see that the system has added a shopping cart (basket) and a checkout form.
5. Viewing orders in the admin system
{$arrowlist}Once customers have placed an order via your site, their order will appear in the system under Orders, which can be accessed via the shortcut menu in the top of the admin system, or by going to Ecommerce Orders. New orders will be alerted at the top of the menu.
{$arrowlist}From the orders list, you can select an order to view.
{$arrowlist}To print the order, just select Print from your browser’s menu. The system will automatically print a printer friendly version.
{$arrowlist}When you have processed the order, change its Status to Processed to ensure it doesn’t appear in the list of new orders.
6. APPENDIX: About PayPal
{$}PayPal is an established online payment system that allows you to receive and make payments via a PayPal account. It is used widely throughout the www, including Ebay who purchased it in 2002. Visit www.paypal.co.uk or www.paypal.com for more information.
{$}Our system cleverly links up to your PayPal account so that it can be used with our ecommerce functionality. We do not have any formal relationship with PayPal nor do we receive any payments from them. We just make it easy to link up our sites with their payment sytem.

